Many people think painting a room is simple, but you need the right skills, patience, and tools to achieve a professional-looking finish. Expert advice can help avoid common pitfalls like messy caulk joints or uneven paint coverage. Whether prepping your walls, selecting the best primer, or mastering brush and roller techniques, these best practices will guide you step-by-step to ensure your project runs smoothly and yields lasting, beautiful results.
Key Takeaways:
- Prepare the room carefully by using the right caulk and selecting appropriate primers based on the surface and paint conditions.
- Follow a systematic painting order—from ceiling to trim, walls, and baseboards—to protect finished work and improve efficiency.
- Use expert techniques for holding and loading brushes, rolling paint evenly, and creating clean edges without relying solely on painter’s tape.
Preparing the Space for Painting
Clearing the Room
Preparing the room properly is the first step toward a seamless paint job. To avoid accidental spills, remove all furniture or move it to the center of the room and cover it with drop cloths. Remove wall hangings, outlet covers, and switch plates to create an unobstructed workspace. This makes painting easier and ensures you don’t damage your belongings while working.
Protecting Furniture and Floors
Use high-quality drop cloths or plastic sheeting to safeguard your floors and furniture from paint splatters and spills. Secure these coverings with painter’s tape to keep them from shifting as you move around. Layer your protection in high-traffic areas to provide extra defense. This preparation helps maintain your space’s condition and saves time cleaning up after finishing your project.
Painting a room can be messy if precautions aren’t taken. To soak up any drips, use durable, absorbent drop cloths. Cover furniture thoroughly—even small gaps can lead to unwanted stains. Besides floor and furniture protection, seal off adjacent rooms with plastic sheeting to control dust and paint fumes. These extra steps preserve your home’s interior and allow you to focus on delivering a clean, professional finish.
Selecting and Using the Right Tools
Investing in quality tools pays off in a smoother, more efficient painting process. This Old House paint professional Mauro Henrique suggests opting for high-end brushes and rollers because they apply paint evenly and provide better coverage. Gather all necessary supplies ahead of time to avoid interruptions once you start.
The proper tools improve the final look and reduce your fatigue and frustration. Using ergonomic handles and selecting the right brush size for cutting in versus broad surfaces streamlines your work. Following expert advice on how to hold and load your brush ensures precise control and less waste, making your painting experience both effective and enjoyable.
Understanding Primer and Paint
Even if painting seems straightforward, understanding the role of primer and choosing the right paint can significantly improve your results. Proper preparation and selecting the appropriate products for your surfaces will ensure you achieve a durable, professional finish that lasts.
Importance of Primer
Across all painting projects, using a primer helps seal porous surfaces and locks in stains, preventing uneven absorption. It enhances paint adhesion and improves coverage, especially on fresh drywall, new plaster, or when switching from dark to light colors. After applying primer, your topcoat will lay down more smoothly, saving you time and coats in the long run.
Types of Primer for Different Surfaces
Primer varies depending on the surface you’re painting. Choosing the right type ensures maximum performance and avoids issues like peeling or blistering. Standard primers include oil-based for wood and metal, latex for drywall, and bonding primers for slick or glossy surfaces.
| Surface | Recommended Primer |
|---|---|
| New Drywall | Latex Primer |
| Wood Trim | Oil-Based Primer |
| Metal | Rust-Inhibiting Oil Primer |
| Glossy Surfaces | Bonding Primer |
| Stained Walls | Stain-Blocking Primer |
Primer prepares each surface differently, so you should match the primer type to your project’s needs. Applying a proper stain-blocking primer on damaged areas, for example, prevents stains from bleeding through your topcoat. After selecting the right primer, follow the manufacturer’s drying time before painting.
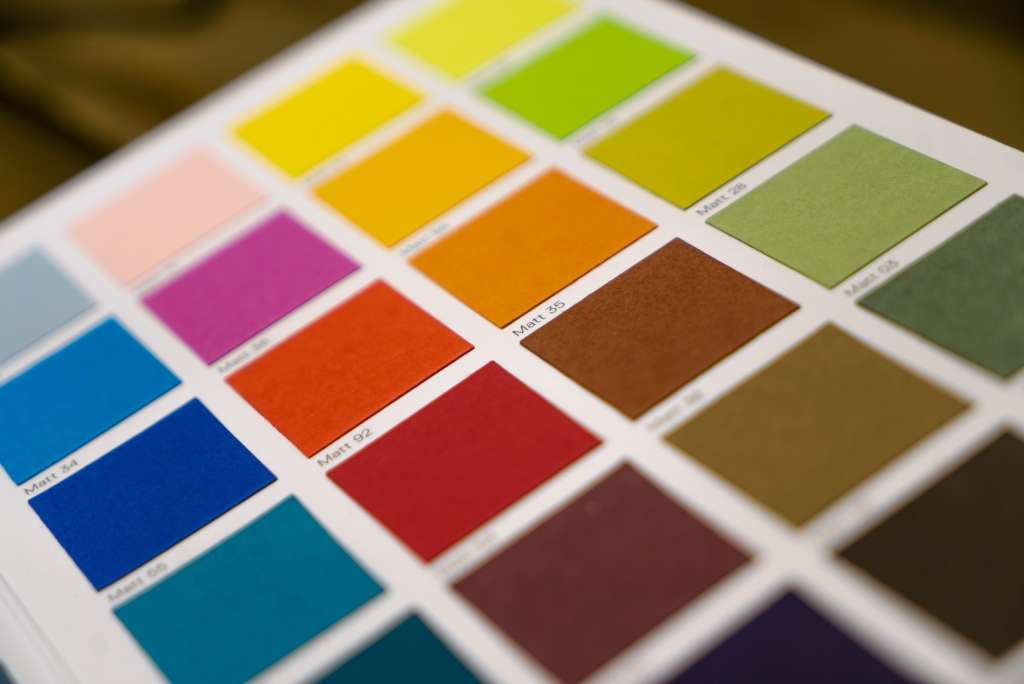
Choosing the Right Paint
Selecting top-quality paint ensures better coverage, durability, and a more attractive finish. Higher-grade paints reduce the coats you must apply and resist chipping and fading. Consider the finish carefully—flat, eggshell, satin, or semi-gloss—each offers different sheen and durability suited to particular rooms.
With your primer in place and paint type chosen wisely, you’ll find the application process smoother and results more rewarding. High-quality paint paired with correct primer leads to an excellent finish that holds up over time, reducing the need for frequent touch-ups.
Important points to keep in mind:
- Primer seals and prepares surfaces for paint.
- Choose primer types based on surface material.
- High-quality paint offers better coverage and durability.
- Match the paint finish to the function of the room.
- After preparation, allow appropriate drying times for best results.
Essential Painting Tools and Accessories
Unlike what many beginners might think, your painting success depends heavily on having the right tools and accessories at hand. Accessories like brushes, rollers, and trays can distinguish between a professional-looking finish and a frustrating mess. To help you equip your workspace efficiently, here’s a quick overview of the indispensable painting essentials you’ll need:
| Brush Types | Angled sash, flat, and detail brushes for precise edges and broad strokes |
| Roller Sizes | Small rollers for tight spaces; large rollers for walls and ceilings |
| Paint Trays | Durable trays with ridges for even paint distribution |
| Drop Cloths | Protect floors and furniture from spills and splatters |
| Painter’s Tape | Use sparingly or replace with taping knives for sharp edges |
Brushes: Types and Uses
Accessories start with choosing the right brushes. Angled sash brushes excel at cutting in around trim and corners, while flat brushes cover larger surfaces smoothly. A detail brush helps with tight spots and touch-ups. Assume that selecting brushes with high-quality synthetic or natural bristles geared for your specific paint type enhances control and finish durability, saving you time and frustration during your project.
Rollers: Choosing the Right Size and Material
The ideal roller size and material depend on your surface and paint type. Use a 4-inch or 6-inch roller for trim and smaller areas, while 9-inch rollers suit walls and ceilings. Foam rollers excel with smooth finishes, and thicker nap rollers handle textured surfaces. Assuming that the roller material matches the surface and the paint will achieve even coverage and reduce drips,
Material significantly impacts paint application. Synthetic rollers are optimal for water-based paints because they resist absorption and maintain texture. In contrast, natural-fiber rollers work best with oil-based paints, offering better paint pick-up and release. Choosing the correct roller nap thickness for your wall texture affects your finish quality: thin naps for smooth walls and thicker naps for porous or rough surfaces. This ensures consistent paint distribution and a professional look.
Paint Trays and Liners
With paint trays and liners, you gain control over how you load and apply paint. Disposable liners made from aluminum foil or plastic make cleanup simple and faster, helping you maintain a neat work area. Investing in quality trays and liners protects your tools and allows you to manage paint more efficiently during your project.
Consequently, using custom-fit disposable liners, as suggested by expert Mauro Henrique, prevents paint from settling in tray crevices and reduces waste. When done, you peel off the liner, leaving your tray clean and ready for your next task. This small step can save hours in cleanup and extend the life of your equipment, improving your overall painting experience.
The Painting Process: Step-by-Step
Despite appearing straightforward, achieving a flawless paint job involves a logical sequence and precise techniques. Following an expert-approved process ensures you protect your work, save time, and get professional results. Below is a breakdown of key steps and methods to help you master your interior painting project.
| Step | Details |
|---|---|
| 1. Ceiling | Begin by painting a 3-inch band around the perimeter with an angled sash brush. Then, use a roller on an extension pole to cover the rest. Apply two coats. |
| 2. Trim, Windows, and Doors | Paint crown molding first, followed by windows, casings, doors, and their casings. If possible, remove the doors and paint them flat in another area. |
| 3. Walls | Cut in around edges for crisp borders, then roll the walls with smooth, even strokes to cover broad areas. |
| 4. Baseboards | Paint baseboards last, starting from the top edge and working downward to catch drips or splatters. |
Establishing a Painting Order
With a systematic start at the ceiling and progress down to the baseboards, you avoid brushing against wet paint or creating drips that spoil your work. Following this top-to-bottom, left-to-right sequence saves time and protects freshly painted surfaces, enabling you to work efficiently and cleanly throughout the project.
Techniques for Cutting In
Cutting in with a brush creates defined, clean lines across tight corners and edges where rollers don’t reach. Holding your brush like a pencil enhances control and helps you maneuver precisely along trims and corners, ensuring your borders are tidy and professional.
A finely tuned cutting-in technique involves dipping the brush only about two fingers’ width into paint to prevent drips. Lightly tap the brush on the bucket side to remove excess, then use smooth, deliberate strokes. Adjusting your grip as you work can reduce hand fatigue, making the process more comfortable and helping you maintain accuracy.
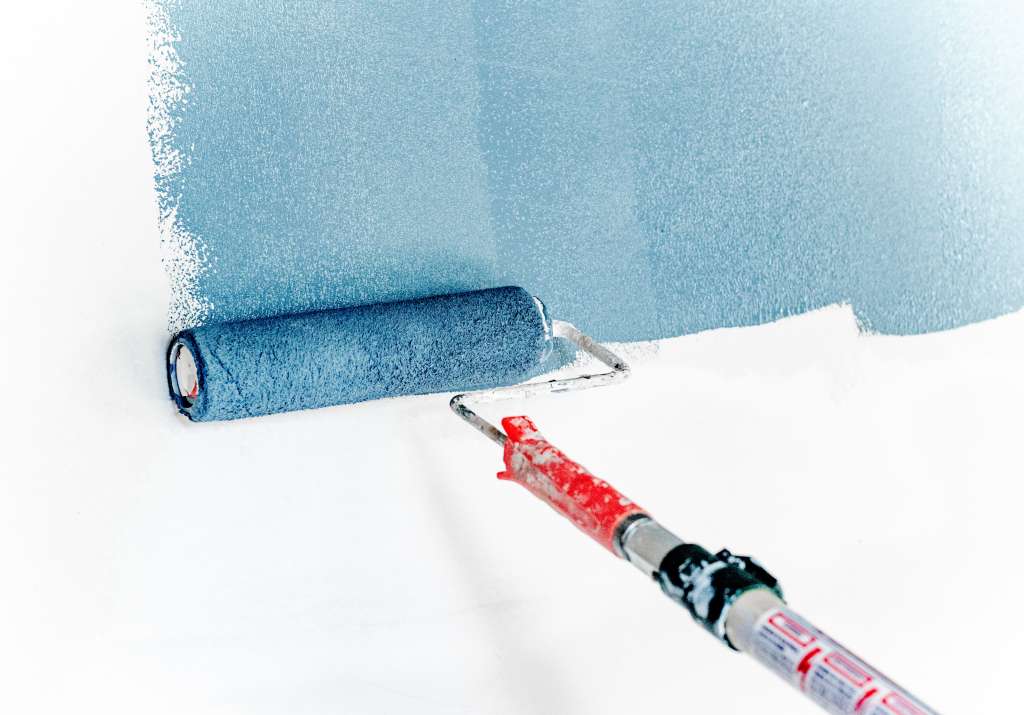
Rolling Techniques for Even Coverage
The foundation of a smooth wall finish lies in rolling the paint with moderate, consistent pressure. By evenly distributing paint on the roller and applying it in overlapping “W” patterns, you fill in all areas without leaving ridges or drips for a flawless look.
Further refinement comes from lightly rolling the edges after covering the wall to seamlessly blend brush and roller textures. You should avoid overloading the roller; the paint should be sufficient but not dripping, ensuring a durable, professional-quality finish with less cleanup afterward.
Paint Finishes and Their Applications
Once again, selecting the right paint finish can significantly impact your project’s look and durability. Different finishes reflect light in varying degrees and offer specific benefits depending on your painting surface and room. Understanding these characteristics will help you achieve a professional-quality result that suits your needs and lifestyle.
Gloss, Semi-Gloss, and Matte Finishes
Gloss finishes provide a shiny, reflective surface that’s easy to clean and durable, making it ideal for trim, doors, and high-traffic areas. Semi-gloss offers a softer sheen with similar durability and is often used on kitchens and bathrooms. In contrast, matte finishes absorb light, hiding imperfections well while giving walls a smooth, velvety look. However, matte is less washable and best reserved for low-traffic areas or ceilings.
Recommendations for Different Rooms
The finish you choose should balance appearance and functionality across your home. High-sheen paints work well in moisture-prone areas or spaces requiring frequent cleaning, while lower-sheen options create cozy atmospheres in bedrooms and living rooms. Tailoring your finish to each room ensures your paint job will maintain its beauty and withstand wear over time.
The variety of in-room use, traffic, and lighting demands that you consider finishes carefully. For instance, semi-gloss or gloss finishes in kitchens and bathrooms resist moisture and stains, helping your walls stay fresher longer. Living spaces benefit from matte or eggshell finishes that soften imperfections and provide a warm appeal. You’ll pick the optimal finish to enhance durability and style by assessing how each room functions.
How to Test and Choose Finishes
Finishes can look quite different once dry and under your room’s lighting. Testing samples on your walls is a smart way to make an informed decision. Apply small patches and observe them at various times of day and in artificial light. This hands-on approach helps you select the right sheen that complements your color choice and meets your practical needs.
Understanding your space’s lighting, wall texture, and daily use is key when you test finishes. Don’t hesitate to experiment with multiple sheen levels to see how they alter your room’s feel and functionality. By evaluating samples, you’ll avoid costly mistakes and ensure your paint finish perfectly suits your home environment.
Tips for Achieving Sharp Edges
Focus on precision and control to achieve sharp edges in your interior paint job. Pay attention to these key points:
- Use the right brush—an angled sash brush offers excellent control for cutting in.
- Hold your brush correctly to manage the paint flow and reduce hand fatigue.
- Apply moderate pressure when painting edges to avoid uneven lines.
- Work slowly and steadily, avoiding rushing that can cause drips or smudges.
Perceiving these details will help you create clean, professional-looking borders that enhance the overall appearance of your paint job.
Using Painter’s Tape Effectively
After selecting high-quality painter’s tape, apply it carefully along the edge you want to protect, pressing down firmly to prevent paint bleed. Avoid pulling the tape too tightly to keep it straight, and remove it soon after the paint becomes tacky but not fully dry to prevent peeling. This technique helps you establish crisp lines without extra touch-ups, saving time and effort.
Techniques Without Tape
Using a wide putty or taping knife as a guide can help you achieve sharp edges when tape isn’t practical. Place the knife along the edge and paint against it with a steady hand and angled brush. This method demands patience but can yield clean results, especially in tight corners or near intricate trim.
Consequently, mastering this technique avoids tape mishaps and offers a flexible solution for tricky spaces where tape is cumbersome or unavailable. Your steady hand and the right tool combine to create precise, paint-bleed-free lines.
Maintaining Clean Lines and Borders
For clean edges, consistently check your brush for excess paint, wiping off drips before applying near borders. Establish a firm grip and steady pace to avoid uneven strokes or accidental smudges. This mindful approach preserves the sharpness of your work as you move across walls and trim.
Also, running a lightly loaded roller along cut-in edges can blend brushstroke textures seamlessly with rolled paint. This technique enhances the uniformity of your finish and helps maintain a professional look throughout the project.
Clean-Up and Maintenance
Cleaning Tools for Reuse
Against neglecting proper cleaning, you should always thoroughly rinse brushes, rollers, and trays with warm, soapy water right after painting. This prevents paint from drying and hardening on your tools, which can drastically reduce their lifespan. Use a brush, comb, or roller spinner to remove excess stain and maintain the shape of bristles or roller nap. Taking these steps ensures your investment in quality tools pays off by allowing multiple uses with consistent results.
Covering Leftover Paint
Avoid leaving cans open or loosely covered when storing leftover paint, as this leads to drying out or skinning over the paint. Pour leftover paint into smaller, airtight containers if necessary, and press a piece of plastic wrap directly onto the surface before sealing with the lid. This method helps maintain freshness and prevents contamination, so you can easily grab it later for touch-ups without mixing new paint.
Hence, proper sealing extends the usability of your paint, saving you time and money on future projects. Label your containers with the color name and date to keep track of your supplies efficiently. Storing paint in a cool, dry place also contributes to preserving its quality for months or even years after your initial job.
Touch-Up Techniques for Future Repairs
Above all, blending is your best friend when touching up walls later. Use a small brush or mini roller to apply leftover paint to scuffs or chips, then feather the edges to match the surrounding surface. Try replicating the original application technique—cutting in before rolling—to maintain a professional appearance without noticeable patches. As Mauro Henrique suggests, keeping a scrap of drywall paper aids in accurate color matching at your local paint store.
Leftover paint combined with the right approach means you won’t have to redo entire walls after minor damage. Store your tools carefully for touch-ups, and maintain a consistent technique for seamless, long-lasting repairs that keep your interior paint job looking fresh.
To wrap up
As a reminder, achieving a professional interior paint job relies on careful preparation, choosing the right primer and tools, and following a logical painting sequence. By controlling how you hold and load your brush, rolling evenly, and planning your work from top to bottom, you’ll save time and ensure a smooth, durable finish. Applying expert techniques like using a putty knife to guide straight edges will help avoid common pitfalls. With patience and attention to detail, your painting project will transform your space with a polished, lasting look.
FAQ
How do I decide when to use primer before painting interior walls?
Primer is most beneficial when painting new drywall or fresh plaster or applying a light paint color over a dark one. It also helps when the previous paint is damaged or when dealing with porous or slick surfaces. If you’re repainting walls in good condition with a similar shade and paint formulation, primer may not be necessary.
What is the best way to paint different room parts for efficient results?
A: Start with the ceiling by painting a perimeter band and rolling the rest. Next, paint the trim, windows, and doors, working top to bottom. Then, cut in and roll the walls, and finally paint the baseboards. This sequence minimizes the risk of damaging freshly painted surfaces and helps avoid rework.
How should I load a paintbrush to reduce mess and improve control?
To prevent contamination, avoid dipping your brush directly into the paint can. Pour paint into a small pail halfway full, then dip the brush bristles about the width of two fingers into the paint. Lightly tap the brush against the pail side to work paint into the bristles and remove excess, which helps prevent dripping and makes cleaning easier.

James Schrienk, a resident of Columbus, OH, is the proud owner of 3S Painting. With a wealth of experience in managing businesses of various scales, his expertise lies in project and people management. Jim thrives in team environments, always focusing on labor efficiency and delivering high-quality client results. His leadership style and practical communication skills have made him an exceptional manager and a driving force behind the success of 3S Painting. When he’s not leading his team to excellence, Jim enjoys continuously exploring innovative strategies to improve customer satisfaction.