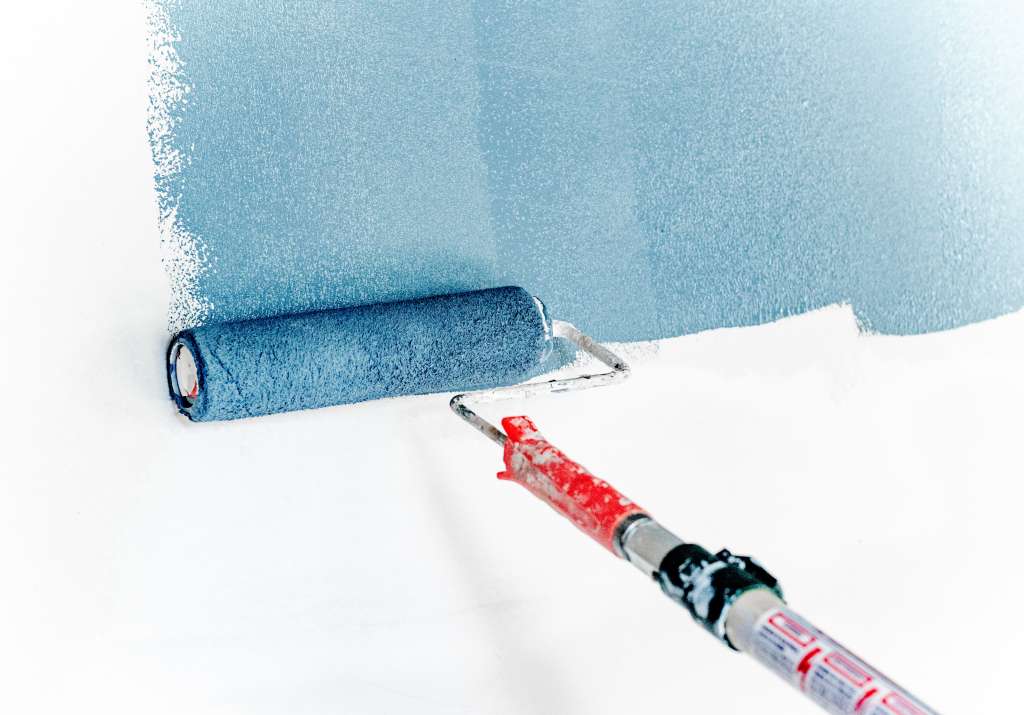
Many homeowners underestimate the significant impact that a fresh coat of paint can have on their living space. When repainting your home’s interior, you not only enhance aesthetic appeal but also improve your mood and increase the value of your property. To ensure a successful project, you should consider the right types of paint, color schemes, and preparation techniques before diving in. By following practical tips, you can avoid common pitfalls and achieve beautiful results that transform your home.
Key Takeaways:
- Choose the right paint finish based on the room’s use; for example, semi-gloss is ideal for high-traffic areas, while matte can work well in low-traffic spaces.
- Consider the lighting in each room when selecting colors, as natural and artificial light can greatly affect how paint colors appear.
- Plan for proper preparation by cleaning walls, patching holes, and using primers when necessary to ensure a smooth and long-lasting finish.
Setting the Stage for Transformation
Assessing Your Current Space
Begin by observing your current interior setup. Take note of the colors, furniture arrangement, and any architectural features that might influence your repainting decisions. Identify areas that may need repair, such as cracked walls or peeling paint, as these will need attention before you choose your new color scheme. The overall size and lighting of each room can also impact how colors will appear once applied, so keep this in mind as you evaluate your space.
Defining Your Goals and Vision
Establish clear goals for your repainting project. Are you aiming for a fresh, modern look, or do you want to create a cozy, inviting atmosphere? Knowing your desired outcome will guide your color choices, patterns, and even finishes. Consider what emotions you want to evoke in each room and how the new paint will complement your existing decor and furniture.
Refining your vision begins with a mood board or a collection of inspirations that resonate with your desired aesthetic. Research color psychology to understand how different colors can affect mood and energy levels. For example, soft blues and greens can promote calmness, while vibrant yellows may evoke cheeriness. Jot down how you want each space to feel, and don’t hesitate to experiment with swatches to visualize your ideas before committing to paint. This thoughtful approach fosters a cohesive design that elevates the ambiance of your home.
The Psychological Impact of Color Choices
Understanding Color Psychology
The colors you choose for your home can significantly influence your mood and energy levels. Each color has unique psychological effects; for example, blue tends to evoke feelings of calmness and tranquility, while yellow can ignite happiness and optimism. Research shows that color can affect your brain chemistry—certain hues can even lower blood pressure or boost serotonin levels. Understanding these associations helps in selecting the right shades for each room.
Selecting Colors that Align with Mood and Function
When deciding on colors, consider both the desired ambiance and the room’s purpose. For a peaceful atmosphere in a bedroom, opt for soft neutrals or pale blues, while a home office might benefit from energizing tones like green or orange. The key is to create an environment that nurtures the activities you engage in daily.
Incorporating a color planning strategy can elevate your home’s atmosphere and functional flow. For instance, a social space like the living room may be enhanced with warm, inviting colors to foster conversation, while a kitchen might leverage bright, stimulating hues that spark creativity during meal prep. You might also explore incorporating accent walls to highlight specific features or zones, providing a visual anchor without overwhelming the space. This thoughtful approach to color selection can make a tremendous difference in how your personal living space feels and functions.
Surface Preparation: The Unsung Hero
Importance of Proper Surface Cleaning
Properly cleaning surfaces before painting is non-negotiable. Dust, grease, and stains can cause paint to adhere poorly, leading to peeling and chipping down the line. Use a mixture of warm water and mild detergent to thoroughly wash the walls, ensuring you tackle spots that might not be immediately visible. Rinse with clean water and allow the surfaces to dry completely before proceeding with any repairs or painting.
Techniques for Repairing Walls and Ceilings
Repairing walls and ceilings often involves filling holes, cracks, or imperfections that can mar the finish of your new coat of paint. Start by cleaning the area around any damage, then use a suitable filler to level the surface. For larger holes, a patch might be necessary before a final layer of primer. Once smooth, sand the area lightly, and ensure to clean away any dust to provide a seamless base for your paint.
Investing time in repairing walls and ceilings ensures a professional-looking finish later on. For small holes, a spackling compound works wonders, while mesh tape can help with larger cracks. If you’re dealing with water damage, be sure to address the root cause first, replacing drywall if needed. After repairs, apply a primer specifically designed for the type of repair you’ve undertaken to seal and prepare the surface effectively before painting. This thorough preparation significantly enhances the final result, guaranteeing the vibrancy and longevity of your new interior paint job.
Paint Selection: Beyond the Color Palette
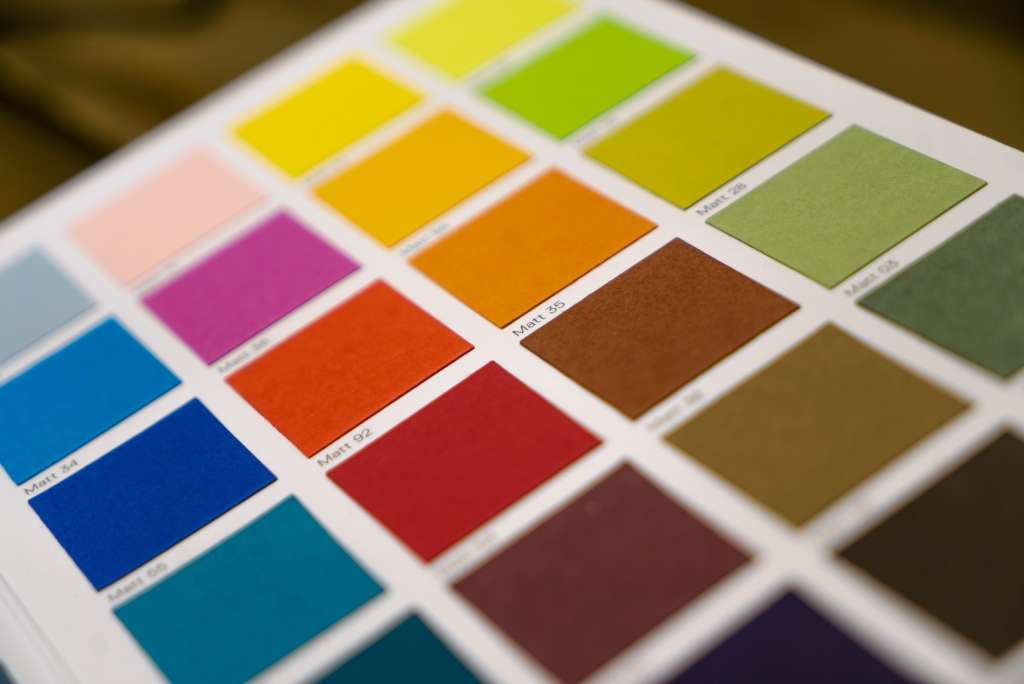
Differentiating Between Paint Types and Finishes
Understanding the different types of paint and finishes available is key to achieving the desired look and durability in your home.
| Type of Paint | Finish |
| Latex | Matte |
| Oil-Based | Satin |
| Spray Paint | Eggshell |
| Chalk Paint | Gloss |
| Milk Paint | Semi-Gloss |
The key is to choose the appropriate type and finish that suits your room’s functionality and aesthetic needs.
Evaluating Eco-Friendly and Low-VOC Options
Choosing eco-friendly and low-VOC paint options can enhance indoor air quality while minimizing your environmental impact. Products labeled as low-VOC contain fewer harmful chemicals, making them safer for both you and your family.
Many manufacturers now offer paints that not only meet your aesthetic needs but also prioritize health and sustainability. For example, brands may incorporate natural ingredients or offer zero-VOC options, which emit no volatile organic compounds into your home. Consider testing samples in your space to ensure you achieve the desired finish while also supporting green initiatives.
Tools of the Trade: Investing in the Right Equipment
Essential Painting Tools Every Homeowner Needs
To achieve a professional-looking finish, gather vital painting tools including high-quality brushes, rollers, trays, painter’s tape, drop cloths, and sponges. Invest in an extendable roller for high ceilings and don’t overlook a sturdy ladder to reach those tricky spots. Each tool plays a crucial role in ensuring you can apply your new paint smoothly and evenly, leading to a satisfying transformation of your space.
Choosing Between Professional Help and DIY Tools
Deciding between professional painters and tackling the job yourself hinges on your experience and budget. If you have the time and willingness to learn, DIY tools can save you money while providing a sense of accomplishment. On the other hand, hiring professionals often guarantees a flawless finish without the stress of overseeing the project yourself.
When weighing your options, consider the scale of your project. For smaller rooms or quick touch-ups, DIY tools can often suffice, given the right preparation. However, larger homes or intricate designs may benefit significantly from the expertise of professionals, especially if you desire a specific technique or color blend that requires a higher skill level. Assessing your comfort with painting can help guide your decision, ensuring the results meet your expectations.
Strategic Planning: Timing and Execution
How to Create a Painting Schedule
Creating a painting schedule ensures that your project stays on track and within your desired timeline. Begin by assessing the size of the area you want to paint and breaking it down into manageable sections. Allocate time for each room, considering prep work, drying time, and final touches. It helps to block out specific days or weekends on your calendar dedicated solely to painting. Creating a painting schedule allows you to visualize your progress and manage your time effectively, ensuring your project doesn’t drag on indefinitely.
Tips for Managing Expectations and Reality
Painting may seem straightforward, but managing your expectations against reality can prevent frustration. If you anticipate completing a room in one day, adjust that timeline based on the number of coats and drying times needed. Have ample supplies on hand to avoid delays, and consider unexpected challenges, such as wall imperfections or weather conditions impacting drying times. Understanding these nuances means you can better navigate the process and stay positive amidst any surprises. Recognizing these realities fosters a more enjoyable experience throughout your painting endeavor.
Having the right mindset is crucial in navigating the painting process. While it’s easy to envision your freshly painted room, fully appreciating the detailed steps involved helps ease potential frustrations. Clear communication with any hired help and a flexible attitude can mitigate surprises. Consider how changes like a last-minute color swap may delay progress, reminding you that adapting is a part of the journey. Recognizing these factors keeps anticipation high and stress levels low, creating an enjoyable experience overall.
- Clear communication with any hired help
- Flexibility is key to overcoming surprises
- Adapting to changes keeps anticipation high
- Understanding detailed steps helps ease frustrations
- Making adjustments, such as color swaps, can delay progress
The Art of Application: Techniques for a Flawless Finish
Mastering the Roll, Brush, and Spray Techniques
Each application technique offers unique benefits for creating a flawless finish. Rollers are excellent for large, flat areas due to their speed and smooth finish, while brushes excel in tight spots and detailed work, allowing you to navigate corners with precision. For a professional touch, consider using a sprayer, which delivers a smooth, even coat but requires practice to master. Choose your tool based on the surface and desired outcome, ensuring you have the right technique to match your project.
Navigating Common Mistakes and How to Fix Them
Common pitfalls in painting can lead to unsatisfactory results, but most mistakes have straightforward solutions. Overlapping paint strokes can create a patchy look, while too much paint on your brush can drip onto your finished surfaces. To remedy these issues, always maintain a steady hand, and if you find drips or uneven spots, sand them down and touch up as needed.
It helps to focus on a few typical errors that can disrupt your painting project. For example, if you notice brush marks or roller lines, they might result from using the wrong size tool for the area or painting too quickly without allowing proper drying time between coats. To correct these, lightly sand the area once dry and apply another coat with a better-suited applicator. Keeping a wet edge—painting in sections without letting the paint dry too much—can significantly improve the overall appearance. This attention to detail ensures you achieve that smooth, professional finish you desire in your home.
Enhancing Aesthetics with Finishing Touches
Importance of Trim and Molding
Trim and molding can significantly elevate the overall look of your interior. These details act as a bridge between different design elements, creating a cohesive appearance. For instance, painted crown molding can add a touch of elegance and draw the eye upwards, making your ceilings feel higher. Similarly, baseboards can frame your floors beautifully, enhancing the room’s dimensions and adding depth without needing extensive renovations.
Accessorizing Your Newly Painted Space
Accessorizing post-repaint is a vital step in personalizing your space. Well-chosen decor, such as artwork, throw pillows, and rugs, can complement your new color scheme and create focal points throughout the room. Use items that resonate with the mood you want to convey. For example, bright colors and bold patterns can invigorate a space, while neutral tones and soft textures promote tranquility. Layering different accessories can also enhance your newly painted walls, adding warmth and character.
Experiment with various accessories to find what works best in your freshly painted environment. Consider incorporating items that reflect your personality, like family photos or travel souvenirs, to create a warm and inviting atmosphere. Vary the heights and textures of your decor to add visual interest. Use plants to introduce a lively element; greenery often complements any palette while improving air quality. Ultimately, accessorizing should encapsulate your taste and harmonize with the overall aesthetic, resulting in a space that feels uniquely yours.
Success through Maintenance: Preserving Your Investment
Tips for Long-Lasting Paint
To ensure that your paint job stands the test of time, consider a few important strategies. First, utilize high-quality paints with superior durability options. Pay close attention to the finish; semi-gloss or satin finishes are great for areas needing extra protection. Additionally, clean surfaces thoroughly before painting to promote proper adhesion. Finally, avoid direct sunlight during application to prevent quick drying. Thou shalt keep your interior looking fresh with well-maintained paint.
Knowing When to Repaint Again
Regular observations can save you time and money. Signs that it’s time to repaint include visible peeling, cracks in the surface, or fading color, especially in high-traffic areas. You should inspect your walls annually, particularly in kitchens and bathrooms, where moisture can cause damage. If your paint begins to lose its gloss or if you notice scuff marks and stains that don’t wash off, these may signal that a fresh coat is in order. Act promptly to preserve your home’s appearance and protect your investment.
Final Words
To wrap up, when repainting your home’s interior, consider the color scheme, preparation, and quality of materials to achieve the best results. Ensure your space is well-prepared by cleaning surfaces and using proper tools to avoid mistakes. Opt for low-VOC or eco-friendly paints for a healthier environment. Don’t forget to test colors in small areas before committing. By following these guidelines, you will create a space that reflects your style and enhances your living experience.
Q: What are the necessary steps to prepare my walls before repainting?
A: Before repainting your home’s interior, start by cleaning the walls to remove dust, dirt, and grease. Use a mild detergent and water solution for washing the surfaces. After cleaning, inspect the walls for any damage such as cracks or holes. Patch any imperfections with spackle or a suitable filler, and sand the area smooth once it’s dry. Lastly, protect your floors and furniture with drop cloths and tape along edges, ensuring a tidy painting process.
Q: How do I choose the right paint color for my rooms?
A: Selecting the right paint color involves considering a few factors. Start by thinking about the mood you want to create in each room. For example, light colors tend to create a spacious and airy feel, while darker tones can add warmth and coziness. It’s also beneficial to take into account the natural lighting in the room, as it can significantly affect how the color appears. Testing a few samples on the walls and observing them at different times of day can help you make the right choice.
Q: What types of paint finishes are available, and how do I choose?
A: In the context of paint finishes, you have several options, including matte, eggshell, satin, semi-gloss, and gloss. Matte finishes hide imperfections and are great for low-traffic areas, while eggshell and satin finishes offer a subtle sheen ideal for living rooms or bedrooms. Semi-gloss and gloss finishes are more durable and easier to clean, making them suitable for kitchens and bathrooms. Consider the room’s function and the level of durability required when selecting a finish.

James Schrienk, a resident of Columbus, OH, is the proud owner of 3S Painting. With a wealth of experience in managing businesses of various scales, his expertise lies in project and people management. Jim thrives in team environments, always focusing on labor efficiency and delivering high-quality client results. His leadership style and practical communication skills have made him an exceptional manager and a driving force behind the success of 3S Painting. When he’s not leading his team to excellence, Jim enjoys continuously exploring innovative strategies to improve customer satisfaction.