You are about to begin on a project that can dramatically enhance your home’s curb appeal and protect it from weather damage. Before you start, it’s essential to understand the best time for painting, prepping techniques, and the right materials. Knowing these details helps avoid common pitfalls like paint peeling or uneven coverage, ensuring a smooth, durable finish. This guide will equip you with the knowledge to make informed decisions, saving you time, money, and frustration throughout your exterior painting journey.
Key Takeaways:
- Prepare the surface thoroughly by cleaning, scraping, and sanding to ensure better paint adhesion and a smoother finish.
- Choose high-quality exterior paint and primer suited for your climate to increase durability and maintain appearance.
- Plan for proper weather conditions, picking a period with mild temperatures and low humidity to allow the paint to dry evenly and properly.
Importance of Exterior Home Painting
Before you decide to paint the exterior of your home, it’s imperative to understand how this task impacts your property’s appearance and health. Exterior painting is more than just a cosmetic update; it plays a significant role in maintaining your home’s structure and value over time. By investing in proper exterior painting, you are not only enhancing your home’s look but also protecting your investment from potential damage.
Enhancing Curb Appeal
Between first impressions and lasting appeal, your home’s exterior paint sets the tone for everything visitors, neighbors, and potential buyers notice. A fresh, well-applied coat can dramatically boost your home’s curb appeal, making it look vibrant and well-maintained. This can create a welcoming atmosphere and reflect your style, turning your house into an attractive space in your neighborhood.
Protecting Your Home
Paint protects your home’s exterior against the elements—sun, rain, wind, and temperature fluctuations. Without this shield, surfaces can suffer damage like cracking, peeling, and rot, especially in harsh climates. Your paint safeguards siding, wood, and other materials, extending their life and reducing costly repairs.
Understanding the importance of this protective layer means you can prevent moisture from penetrating your home’s surface, which could otherwise lead to mold growth and structural deterioration. This keeps your home looking its best, supports a healthy living environment, and improves the longevity of your exterior surfaces.
Increasing Property Value
At the time of selling, a well-maintained exterior paint job can significantly enhance your home’s market value. Potential buyers often equate a fresh exterior with a well-cared-for property, making your house more appealing and easier to sell. This can result in a higher offer and a quicker sale, maximizing your financial return.
Indeed, investing in quality exterior painting is a smart financial move that pays off. It signals buyers that you have taken good care of your home, minimizes upfront repair concerns, and improves overall desirability, all of which contribute to a stronger position in the competitive real estate market.
Best Times to Paint
Seasonal Considerations
After you paint your home’s exterior, consider the season carefully. Late spring through early fall generally offers the best conditions, as warmer temperatures and lower humidity help the paint dry evenly and adhere properly. Painting in winter or during rainy seasons can lead to problems such as slow drying and peeling. Choosing the right season ensures your work lasts longer and your home’s appearance remains vibrant.
Weather Conditions
Above all, you want to paint your home under dry, mild weather. Avoid painting during rain, high humidity, or extreme heat, as these conditions can compromise the paint’s finish and adhesion. Ideal temperatures typically range between 50°F and 85°F. Understanding how weather affects your project will help you achieve a smooth, durable finish that withstands the elements.
With weather playing a significant role, watch for forecasted rain for at least 24 hours after painting. High humidity can trap moisture in fresh paint, leading to bubbling or blistering, while very hot, direct sunlight can cause paint to dry too quickly, resulting in visible brush marks or cracking. Planning around these conditions protects your time and investment, giving you a flawless coat that lasts.
Timing Your Project
On days when the weather matches ideal painting conditions, you should start early in the day to allow ample drying time before evening temperatures drop. Stagger your painting schedule around surface preparation and curing times, ensuring each layer is applied correctly. This approach minimizes the risk of paint damage and helps you maintain a consistent workflow.
Conditions during your project can dictate success. Optimal timing allows paint to dry thoroughly between coats, enhances durability, and avoids paint failure caused by rush or poor weather. Scheduling your painting task with the right timing helps you maximize efficiency while achieving professional results that beautify and protect your home for years.
Choosing the Right Paint
Types of Exterior Paint
You should understand the main types available to select the best exterior paint for your home. By comparing the key features of each, you can make an informed choice that fits your needs and climate conditions.
| Paint Type | Main Characteristics |
|---|---|
| Acrylic Latex | Durable, flexible, and resists fading |
| Oil-Based | Provides a smooth finish but takes longer to dry |
| Elastomeric | Thick, waterproof coating ideal for masonry surfaces |
| Chalk Paint | Matte finish with a weathered appearance; less durable outdoors |
| Milk Paint | Eco-friendly, natural, and biodegradable |
Any choice you make should consider your home’s exterior material to ensure optimal protection and appearance.
Finish Options: Gloss, Satin, and Matte
Above all, the finish you select will impact your home’s aesthetic and durability. Gloss finishes are shiny and easy to clean, satin offers a soft sheen with moderate durability, and matte finishes provide a non-reflective surface that hides imperfections but may be less washable.
Your finish can also affect your home’s appearance during different weather conditions. For example, gloss reflects more light, making colors pop but highlighting surface flaws, whereas matte gives a more subtle look while concealing irregularities. Each has trade-offs between durability, cleaning ease, and visual appeal, so carefully consider your house’s style and maintenance preferences.
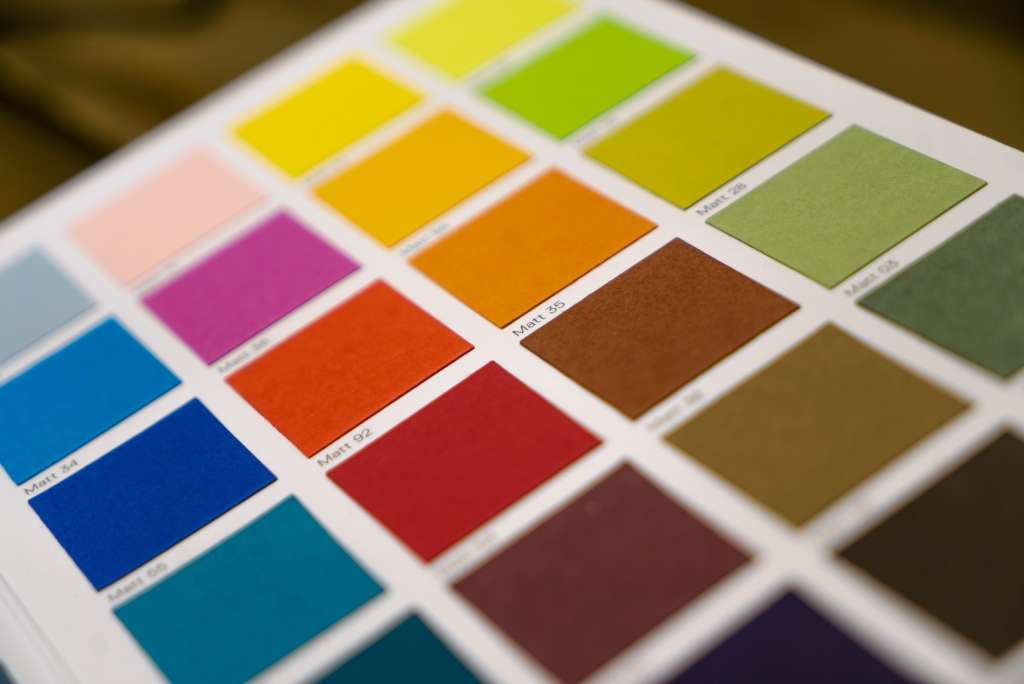
Selecting Colors
At the outset, selecting exterior paint colors means balancing personal taste with practical factors. You want hues that complement your home’s architecture and neighborhood. Lighter colors can make your home appear larger and reflect heat, while darker tones bring warmth but may fade more quickly under sun exposure.
In addition to aesthetics, think about the longevity of your color choice. Some shades, particularly vibrant or deep colors, may require more frequent touch-ups as sunlight can cause fading. You should also consider how color affects your home’s energy efficiency and curb appeal. Testing samples in different lighting on your home’s facade will help you envision the final look accurately.
Preparing Your Home
Unlike interior painting, exterior home painting requires thorough preparation to ensure lasting results. Before you dip your brush, attention to every detail of your home’s surface is vital to creating an ideal canvas for paint application and protecting your investment.
Cleaning the Surface
Dirt, mold, and loose paint accumulate impurities on your home’s exterior that can prevent paint adhesion. Power wash or scrub the surface to remove all debris. This step not only improves paint coverage but also prevents peeling. Use appropriate cleaning agents based on your siding type, and allow the surface to dry completely before moving on.
Repairing Damages
Besides cleaning, repairing damaged areas solidifies the integrity of your home’s exterior and ensures an even finish. Fill cracks, replace rotten wood, and fix loose siding before painting. Skipping repairs can lead to uneven surfaces and paint failure over time, leaving you vulnerable to weather damage and costly repairs later.
Home repairs might involve more than just filling small cracks; structural issues, extensive rot, or termite damage could require professional intervention. Inspect your home thoroughly and address all compromised areas to safeguard your investment and create the best painting surface.
Priming Surfaces
Priming is vital to achieving a vibrant, long-lasting paint job. Applying a quality primer seals the surface, promotes the adhesion of the topcoat, and blocks stains or tannins from bleeding through. This step ensures your paint looks fresh and lasts longer, saving you time and money.
Surface preparation can vary depending on the material you’re painting. For example, bare wood, metal, or previously unpainted masonry often requires specific primers to protect and enhance paint durability. Choosing the right primer tailored to your home’s exterior materials strengthens your paint’s resilience against UV rays and moisture.
Tools and Equipment Needed
Essential Painting Tools
Despite the temptation to start painting immediately, having the right tools is key to achieving a smooth, professional finish. Among the vitals, you’ll need quality paintbrushes, rollers, drop cloths to protect surfaces, painter’s tape for clean edges, and sturdy ladders to reach high spots safely. Investing in these tools upfront can make your project much easier and more efficient.
Safety Gear
Equipment like gloves, goggles, and respirators forms your first defense against paint fumes, splatters, and harmful chemicals. You’ll want to protect your skin and eyes while you work, so you’re not exposed to irritants or airborne particles.
Considering the risks involved in exterior painting, such as exposure to toxic fumes and the danger of falling from heights, proper safety gear is not just recommended but should be non-negotiable. This gear helps you work confidently and protect your health throughout the project.
Choosing the Right Brushes and Rollers
Safety in the painting process also means using the right tools for your surface. Synthetic brushes work well with water-based paints, while natural bristle brushes are suited for oil-based paints. Both ensure durability and a flawless application without excess effort or mess.
However, understanding the type of surface you’re painting—whether rough siding or smooth trim—will guide you in selecting rollers with appropriate nap lengths. This choice affects how evenly the paint spreads and can save you from tedious reapplications or drips.
Professional vs. DIY Painting
Advantages of Hiring Professionals
Not everyone has the time, expertise, or tools needed for an exterior home painting project. About hiring professionals, you gain access to experienced painters who understand surface preparation, the right materials, and efficient techniques. Professionals can ensure a high-quality, long-lasting finish, save time, and avoid costly mistakes. Their expertise in handling difficult spots and weather considerations also reduces the risk of damage or imperfect results, giving you peace of mind throughout the process.
When to DIY
By choosing to do your exterior painting yourself, you save on labor costs and gain a hands-on sense of accomplishment. DIY can be rewarding if the project is relatively small or you have basic painting knowledge and the necessary tools. However, it requires careful planning, patience, and physical effort.
For instance, if your home’s exterior is in good condition and you’re confident in your skills, a DIY approach could be cost-effective and flexible around your schedule. Simple tasks like painting trim or repainting a smaller surface area may be perfect for a DIY project.
Cost Considerations
Regarding the cost factor, hiring a professional will generally be more expensive upfront than doing it yourself. However, professionals bring expertise and tools to prevent hidden costs, such as damage repair or premature touch-ups. Weighing the initial expenses against long-term results is essential in your decision.
Hiring professionals often means you get warranties or guarantees on workmanship and materials, which can save money over time. On the other hand, DIY may reduce expenses but requires investment in quality materials and may involve redoing sections if done improperly, potentially increasing overall costs.
Maintenance After Painting
Once again, maintaining your freshly painted exterior ensures longevity and keeps your home vibrant. Understanding the proper maintenance practices will protect your investment and enhance your home’s curb appeal for years.
Routine Inspections
You should conduct routine inspections regularly to check for any signs of paint damage, such as peeling, cracking, or blistering. Early detection of these issues allows you to address them quickly before they worsen, protecting your home’s exterior from weather-related damage and wear.
Cleaning Techniques
At least twice a year, gently clean your exterior walls to remove dirt, mold, and mildew. Using a soft-bristle brush or a low-pressure washer with mild detergent helps maintain your paint’s finish without causing damage. Proper cleaning techniques will keep your paint fresh and prevent buildup that can deteriorate the surface.
Understanding how to correctly clean your newly painted surface is key to preserving its quality. Harsh chemicals or high-pressure washing can strip away paint, exposing your home to the elements. Stick to gentle cleaning agents and avoid abrasive tools, ensuring the protective layer remains intact and your paint’s lifespan is extended.
Touch-Up Tips
Cleaning small spots before applying touch-up paint ensures proper adhesion. Use the same paint brand and color to maintain a consistent look. Simple touch-ups can effectively cover minor damages and imperfections. Knowing how to perform touch-up work properly helps avoid larger, costly repainting jobs later.
Plus, when performing touch-ups, follow these imperative steps for best results:
- Match paint color precisely to avoid visible patches
- Clean and sand the area lightly to ensure smooth application
- Apply thin coats and allow adequate drying time between layers
- Protect surrounding areas from accidental paint splashes or drips
Knowing these steps will keep your exterior paintwork pristine, preserving your home’s beauty and value with minimal effort.
Before you start your exterior home painting project, you should thoroughly prepare your surfaces, select the correct type of paint, and consider the weather conditions. Proper tools and safety measures will enhance efficiency and ensure a lasting finish. By understanding these key aspects, you can avoid common pitfalls and achieve a professional-looking result that boosts your home’s curb appeal and protects it from the elements.
FAQ
What type of paint finish is best for exterior home painting?
Satin or semi-gloss finishes are typically recommended for exterior home painting. These finishes balance durability and appearance. Satin offers a soft sheen that hides imperfections, while semi-gloss is more resistant to mildew and easier to clean, making it ideal for trim and high-traffic areas. Choosing the right finish depends on the surface material and desired look.
How should weather conditions influence the timing of exterior painting?
Weather plays an important role when planning exterior painting. Ideally, paint should be applied during dry conditions with moderate temperatures, usually between 50°F and 85°F (10°C to 29°C). Avoid painting during rainy, extremely hot, or freezing weather as these conditions can affect paint adhesion and drying times, potentially leading to peeling or uneven finishes.
What surface preparation is needed before painting the exterior of a home?
Proper surface preparation is key to a successful paint job. This includes cleaning away dirt, mildew, and loose paint, repairing damaged siding or trim, and sanding rough areas to create a smooth surface. Additionally, applying a suitable primer can improve paint adhesion and extend the life of the paint. Taking time to prepare surfaces thoroughly ensures a more durable and attractive finish.

James Schrienk, a resident of Columbus, OH, is the proud owner of 3S Painting. With a wealth of experience in managing businesses of various scales, his expertise lies in project and people management. Jim thrives in team environments, always focusing on labor efficiency and delivering high-quality client results. His leadership style and practical communication skills have made him an exceptional manager and a driving force behind the success of 3S Painting. When he’s not leading his team to excellence, Jim enjoys continuously exploring innovative strategies to improve customer satisfaction.