Columbus Painting Contractors’ Playbook To Prevent Siding Damage
Why Ohio exteriors fail
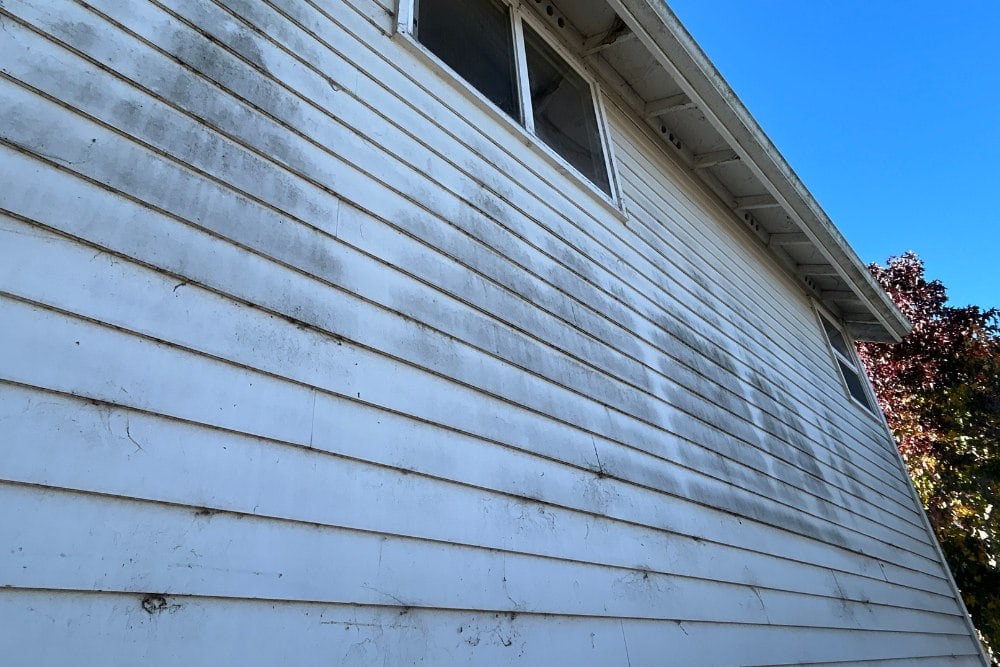
Central Ohio puts siding and paint through repeated stress: winter freeze‑thaw movement, summer UV exposure, and wind‑driven rain that finds tiny openings and turns them into bigger problems.
Most breakdowns show up in a few predictable ways:
-
Peeling / flaking: Usually an adhesion problem caused by moisture behind the coating, poor prep, or incompatible paint layers.
-
Chalking: A dusty, powder-like film that rubs off—typically UV/age breaking down the paint binder over time.
-
Fading: Sun exposure + pigment wear; the most exposed elevations (often south/west) typically show it first.
The key principle: the “look” is a clue—treat the cause, not just the surface.
2-minute exterior clue check
Use this quick check to decide whether the issue is mainly UV/age, moisture, or adhesion failure.
-
Palm swipe test: Wipe the surface with your hand. If it leaves a powdery residue, you’re dealing with chalking and will need thorough cleaning plus a primer that bonds to aged paint.
-
Edge lift test: Gently lift a loose paint edge. If multiple layers release together, the old coats likely aren’t bonded well—expect heavier scraping/sanding and a stronger bonding primer approach.
-
Moisture “hot spots”: Check under gutters, near downspouts, beneath window sills, and at trim joints for staining, softness, or persistent dampness that suggests water entry.
-
Sun comparison: Compare the sunny elevation to shaded walls. If only sunny sides look dull (without softness or staining), UV/age is likely the primary driver.
Symptoms → causes table
| What you see | Most likely cause | What to do first | What not to do |
|---|---|---|---|
| Peeling or sheets of paint | Moisture intrusion or adhesion failure between layers | Stop water entry, dry fully, then prep to a sound edge and prime correctly | Don’t “paint over it” to hide it—it returns quickly |
| Dusty residue on your hand (chalking) | UV/age breaking down the coating | Wash/de-chalk thoroughly; use a primer designed to bond to aged/chalky paint | Don’t skip cleaning—topcoat adhesion suffers |
| Faded, dull, sun-beaten color | UV exposure, normal aging | Wash + repaint; pick UV-resistant, exterior-grade coatings | Don’t assume fading means failure—inspect for moisture too |
| Dark staining / softness near trim | Water entry at joints, edges, or drainage points | Fix caulk/flashing/gutter routing; repair damaged wood | Don’t seal in wet wood |
The contractor sequence
Think in systems: Find the source → dry the wall → build a coating system. Skipping steps is the fastest way to shorten service life.
1) Locate water and stop it
Trace water paths at rooflines, flashing, gutters, downspouts, window/door trim joints, and splashback near grade.
Correct drainage and seal failures first—otherwise even premium paint fails early.
2) Clean without forcing water into joints
Use low-pressure washing with a siding-safe cleaner and a thorough rinse.
Avoid aggressive pressure that can drive water behind siding and into seams.
3) Prep mechanically
Remove loose paint until you hit a stable edge, then sand to smooth transitions so the finished film doesn’t show ridges.
Repair damaged boards/trim; localized rot can sometimes be repaired, but widespread softness often means replacement is smarter than patching.
4) Prime to match the failure mode
Different problems require different primer strategies—especially when switching substrates or coating types.
Where staining, heavy weathering, or adhesion issues exist, primer choice matters as much as the topcoat.
5) Seal joints
Use exterior-grade, high-flex sealants for moving joints and trim seams where appropriate, and avoid sealing drainage paths that are designed to let moisture escape.
6) Apply a durable topcoat system
Quality exterior acrylic coatings are widely used for flexibility and weathering resistance; follow product spread rates and cure conditions for best results.
Internal link (as requested): Exterior Painting Services
https://columbusohiopainting.com/exterior-painting/
Tactics by siding material (what changes, what doesn’t)
Wood siding
Wood is most vulnerable to moisture cycling and can stain/bleed depending on species and prior conditions.
Priorities: stop water, repair soft areas, prime properly, and seal end-grain/cut ends where exposure is highest.
Fiber-cement (ex: Hardie-type systems)
Common issues tend to be surface weathering and chalky/aged coatings if maintenance is delayed.
Priorities: thorough cleaning/de-chalking, bonding primer where needed, then a high-quality exterior topcoat system.
Aluminum siding
Often shows chalking and fading more than true peeling (unless previous coatings were poorly bonded).
Priorities: remove oxidation/chalk, use the correct bonding approach for the surface condition, then topcoat.
Vinyl siding
Vinyl failures often relate to heat and movement; darker colors can increase heat load and risk warping if the product/color system isn’t compatible.
Priorities: cleaning, correct prep, and color choices that respect vinyl limitations.
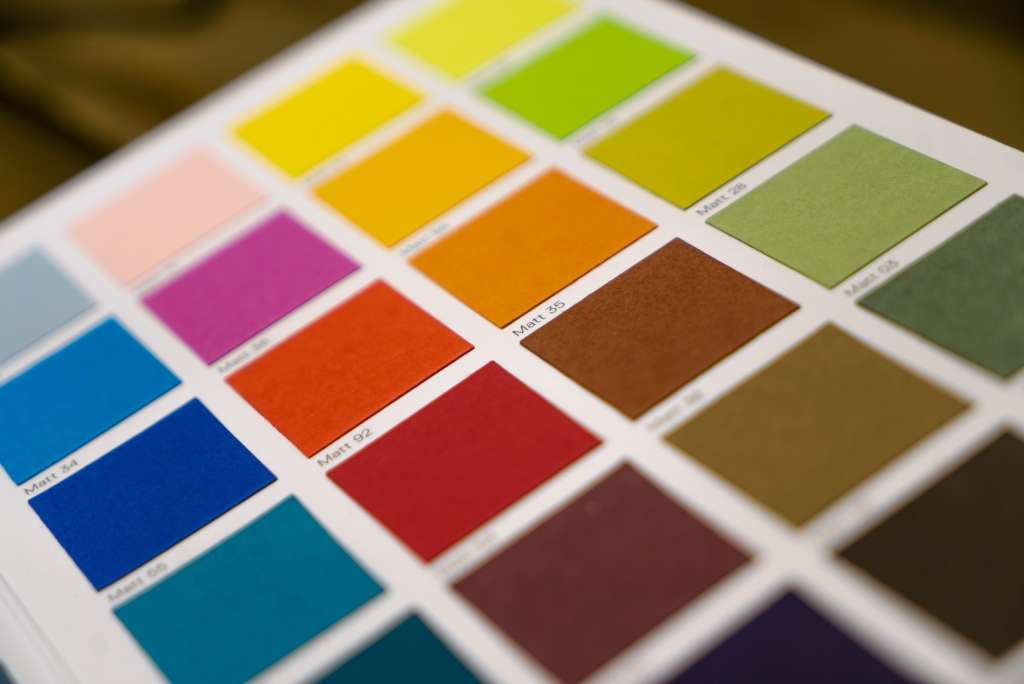
Color + exposure strategy
-
Use slightly lighter, sun-tolerant colors on the most exposed elevations to reduce heat load and visible fade.
-
Put darker tones on smaller areas (trim/accents) to get contrast without maximizing heat on large fields.
-
Test samples on both sunny and shaded sides before committing—exposure changes how color reads and how fast it weathers.
Maintenance that extends life
-
Annual gentle rinse: Removes pollen, grime, and residue that can accelerate wear.
-
Spring joint check: Address hairline cracks early before water gets behind the film.
-
Control sprinklers: Repeated wetting at the same spot drives localized failure.
-
Keep a labeled touch-up kit: Small repairs done quickly prevent big repaints later.
When repainting is no longer the right fix
A coating system can’t compensate for structurally compromised material or chronic moisture that hasn’t been solved. Watch for:
-
Widespread soft wood or recurring rot signs.
-
Panels/boards that are deteriorating beneath the paint (not just surface wear).
-
Repeat peeling in the same zones even after prior repainting (points to unresolved water entry).
Ready for a Siding Turnaround?
If your hand comes away chalky, if flakes are piling at the foundation, or if color is washed out on the west wall, it’s time to act. A proper Assess → Dry → Prep → Prime → Paint → Protect plan restores curb appeal and stops the cycle of failure. For a tailored plan and a clean, durable finish, tap our Columbus painting contractors—and start with an honest exterior inspection and a clear scope.
FAQs
1) How often should a Columbus home expect to repaint exterior siding?
Repaint timing depends on sun exposure, moisture load, and how well the last job was prepped; the most exposed walls usually show wear first (often south/west).
2) What should be done if the paint feels “dusty” when touched?
That powdery residue is a sign the surface needs to be cleaned and stabilized before new coatings go on, otherwise the next layer may not bond well.
3) If paint failure is happening on only one side of the house, what does that usually indicate?
A single problem elevation commonly points to a localized cause—like overflow/backup near gutters, wind-driven rain at a specific corner, or sun/heat stress on one wall.
4) What finish should be used on siding vs. trim for a clean look?
Many homeowners choose lower-sheen finishes on siding to reduce the appearance of surface irregularities, then use a higher-sheen finish on trim/doors for easier washing and sharper contrast.
5) Are dark exterior colors safe for every siding type?
Darker colors absorb more heat; whether that’s “fine” depends on the substrate and its movement/heat tolerance, so color choices should be made with the siding material in mind.

James Schrienk, a resident of Columbus, OH, is the proud owner of 3S Painting. With a wealth of experience in managing businesses of various scales, his expertise lies in project and people management. Jim thrives in team environments, always focusing on labor efficiency and delivering high-quality client results. His leadership style and practical communication skills have made him an exceptional manager and a driving force behind the success of 3S Painting. When he’s not leading his team to excellence, Jim enjoys continuously exploring innovative strategies to improve customer satisfaction.