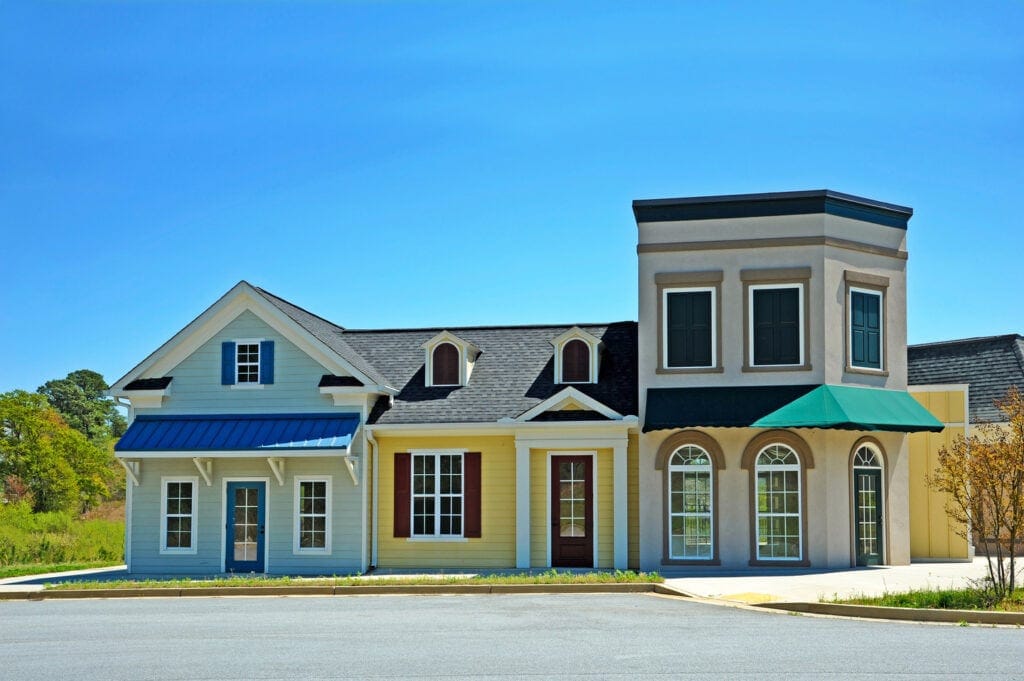
When homeowners think about cabinet painting, they usually picture the final color.
They imagine brighter kitchen cabinets, a cleaner bathroom vanity, or a more updated look without the cost of a full replacement. What many people do not think about right away is the part that has the biggest impact on the result: preparation.
That is where a skilled Columbus cabinet painter stands apart.
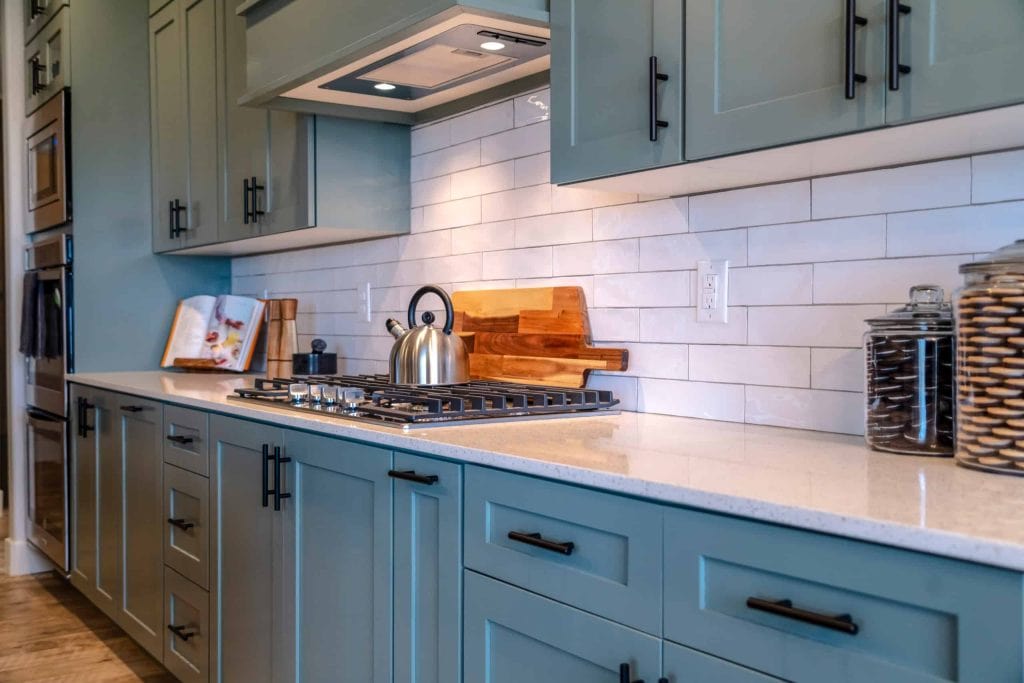
Cabinet painting is very different from painting a standard wall. Cabinets deal with more touching, more grease, more moisture, more cleaning, and more daily wear and tear. They are opened and closed constantly. They sit close to sinks, cooking areas, and high-use spaces. Because of that, the finish needs to do more than look good for the first week. It needs to hold up.
That kind of result starts well before the first coat of paint goes on.
This guide explains why prep work matters so much, what can go wrong when it is rushed, and why homeowners searching for a Columbus cabinet painter should pay close attention to the process before focusing only on the color.
Cabinet Painting Is Not the Same as Wall Painting
One reason prep work gets overlooked is that many people compare cabinet painting to regular interior painting.
Walls and cabinets are not exposed to the same kind of use. A wall in a bedroom may sit untouched for most of the day. A cabinet door in a kitchen may be opened and closed dozens of times before dinner. Add heat, food residue, cleaning products, moisture, and small impacts from everyday use, and it becomes clear why cabinets need a stronger approach.
Cabinets also have more detailed surfaces. Door fronts, drawer faces, edges, corners, grooves, hardware areas, and frames all need careful attention. Any flaw in the prep tends to show more clearly once the finish goes on.
That is why cabinet painting depends so heavily on the early steps. Smooth, lasting results usually come from strong prep, not from quick application.
The Surface Has to Be Truly Clean Before Anything Else
One of the biggest reasons cabinet paint fails early is simple: the surface was not fully cleaned.
Kitchen and bathroom cabinets collect much more buildup than many homeowners realize. Cooking residue, hand oils, dust, product splatter, and general grime can create a thin layer across doors and drawer fronts. Even when cabinets look fairly clean, that buildup can interfere with adhesion.
If paint or primer is applied over that residue, the finish may struggle to bond the way it should. Sometimes the problem shows up quickly as chipping or a weak hold near handles and edges. Other times, it appears later, once daily use puts stress on the surface.
Proper cleaning is one of those steps that does not look dramatic while it is happening, but it has a huge effect on what comes later. Without it, the rest of the process is already working from a weak starting point.
Grease and Oils Create More Trouble Than Homeowners Expect
This issue becomes even more important in kitchens.
Cabinets near stoves, prep areas, and frequently touched doors tend to collect grease and oils over time. The buildup may not always be obvious, especially on older finishes or darker cabinet colors. But once new paint is applied, weak adhesion can appear where the surface wasn’t cleaned well enough.
That is one reason cabinet painting often fails first around handles, corners, and frequently used door edges. Those are the spots where oils from hands and everyday use build up the most.
Homeowners sometimes assume a light wipe-down is enough before painting. For cabinets, it usually is not. Prep has to deal with the actual use of the space, not just the cabinets’ visible appearance on the day the work begins.
Sanding Helps the Finish Grip Better
Another major part of cabinet prep is sanding.
Sanding helps dull the old finish and gives the new coating a better surface to grip. It can also help smooth minor flaws, reduce rough spots, and create a more even feel across cabinet faces and frames. Without enough sanding, the new finish may struggle to bond well, especially on slick or previously coated surfaces.
This does not mean every cabinet needs the same sanding approach. Different cabinet materials and previous finishes may need different treatment. What matters is that the surface is prepared in a way that supports adhesion and helps the final finish look more uniform.
For homeowners, sanding may seem like a small technical step. In reality, it is one of the main reasons a cabinet paint job feels durable instead of temporary.
Repairs Need to Happen Before Painting Starts
Paint can improve the look of cabinets, but it cannot solve every cabinet problem on its own.
If cabinet doors have dents, chips, rough areas, or small damage around hardware, those issues should be handled during prep. Otherwise, the new finish may only make them more noticeable.
This is especially true with older cabinets. Years of use can leave wear around drawer edges, door corners, hinge areas, and high-contact spots. A fresh color may brighten the cabinets overall, but it will not hide damaged surfaces unless they are repaired first.
That is why good prep often includes more than cleaning and sanding. It also includes checking for areas that need patching, filling, smoothing, or adjustment before the finish goes on.
Hardware Removal Helps Create a Cleaner Result
A polished cabinet painting project usually depends on details, and hardware is one of them.
When knobs, pulls, and other hardware are handled correctly during prep, the result tends to look cleaner and more complete. This helps prevent awkward paint buildup around handles, messy edges, and uneven coverage around mounting points.
It also gives the painter better access to the full face of the cabinet door or drawer front. That matters because cabinet finishes are viewed up close. Small inconsistencies that might go unnoticed on a wall often stand out on cabinetry.
Homeowners may focus most on color, but the clean look they want usually comes from many small prep decisions working together.
Primer Plays a Bigger Role Than Many Homeowners Realize
Primer is another step that gets underestimated.
A strong primer improves adhesion, supports a more even finish, and can help reduce problems caused by the previous coating or surface condition. It also helps create a more stable base for the topcoat.
Skipping or rushing the primer can lead to weaker performance later. In some cases, the finish may chip more easily. In others, coverage may look inconsistent or wear faster in high-use spots.
This is one more reason homeowners should pay attention to the process rather than assuming cabinet painting is just about brushing on a new color. A good-looking finish depends on what is underneath it.
Prep Work Helps Prevent Chipping and Peeling
When cabinet painting fails, homeowners often notice the same kinds of problems first.
The paint may chip near handles. Edges may start to wear early. Corners may peel. Small rubbed areas may show up much sooner than expected. These issues are frustrating because the cabinets may have looked great right after the project was finished.
In many cases, those problems trace back to prep.
If cabinets were not cleaned thoroughly, sanded correctly, repaired where needed, or primed properly, the finish has less support. It may still look good at the start, but daily use exposes the weakness over time.
This is why prep matters so much. Cabinets are not forgiving surfaces. They reveal poor preparation sooner than many other painted areas in the home.
Smooth Results Depend on What Happens Before the Finish Coat
When homeowners say they want their cabinets to look updated, they usually picture a smooth, even finish.
That look does not come from color alone. It comes from the surface condition.
If the surface underneath is rough, greasy, damaged, or uneven, the final finish will reflect that. Good prep helps reduce those problems before they get trapped under paint. It creates a better base so the finished cabinets look cleaner, sharper, and more consistent.
This matters even more in kitchens, where cabinets sit at eye level and at close range. People see them every day. Guests notice them. Small flaws stand out more than they would on a larger surface, such as a wall or ceiling.
Cabinet Edges and High-Touch Areas Need Extra Attention
Not all parts of a cabinet wear the same way.
Edges, corners, drawer fronts, and areas around handles tend to take the most abuse. These spots are constantly touched and are more likely to show weakness if prep wasn’t done well.
A strong cabinet painting process pays close attention to these areas from the beginning. They need proper cleaning, careful sanding, and adequate support for adhesion because they are often the first places to show signs of wear.
This is one reason homeowners should not judge a cabinet paint job only by how the center of a door looks on day one. The long-term quality often shows up first in the edges and high-contact areas.
Prep Work Helps the Color Look Better Too
Many homeowners think of prep as a durability issue only, but it also affects appearance.
Color tends to look better on a well-prepared surface. Coverage looks more even. The finish feels more consistent. The cabinet lines look cleaner. Doors and drawers feel more like they belong together as one finished set.
Without strong prep, even a beautiful color can fall flat. Uneven texture, rough patches, weak coverage, and surface flaws can distract from the update the homeowner was hoping to achieve.
That is why the prep stage is not separate from the visual result. It is a big part of it.
Older Cabinets Often Need More Preparation
Older cabinets can still be great candidates for painting, but they often need more careful prep.
Years of use can leave behind scratches, worn edges, shiny spots, minor swelling, residue buildup, and previous touch-ups that affect how the surface behaves. Some cabinets may also have older finishes that need extra attention before a new coating can bond well.
That does not mean older cabinets cannot turn out beautifully. It simply means the process should respect what the cabinets have already been through.
For homeowners, this is an important point. The age of the cabinets matters less than the condition of the surface and the quality of the prep that happens before painting begins.
Why Quick Cabinet Paint Jobs Often Disappoint
A rushed cabinet painting project may seem appealing because it sounds faster and easier.
But when prep is trimmed down, the result often shows it later. The finish may not hold up around handles. Paint may start to chip sooner than expected. The cabinets may look refreshed at first, but they may begin showing wear much earlier than the homeowner hoped.
This is one reason cheaper or rushed cabinet jobs can feel disappointing over time. The problem is not always the color or even the paint product itself. It is often the case that the cabinets never got the preparation they needed in the first place.
Cabinet painting is one of those projects where the difference between average and strong results often comes down to patience during the prep stage.
What a Columbus Cabinet Painter Should Be Thinking About
When hiring a Columbus cabinet painter, homeowners should look beyond the final color sample and ask how the cabinets will be prepared.
That includes how surfaces will be cleaned, whether doors and drawers are being handled carefully, how repairs are addressed, what kind of sanding is involved, and how the finish is being supported from the start.
A painter who treats prep seriously is usually thinking about more than appearance. They are thinking about durability, touch points, adhesion, and how the cabinets will perform in a real household.
That mindset matters because cabinet painting is not just about making the kitchen look updated for a few photos. It is about creating a result that still feels worth it after months of everyday use.
Why Professional Prep Helps the Whole Kitchen Feel Better
Cabinets take up a lot of visual space.
Because of that, their finish affects the entire feel of the kitchen or bathroom. When cabinets look rough, dated, or worn, the whole room can feel older than it really is. When the finish looks smooth and clean, the room feels brighter, more current, and more put-together.
That improvement is one reason cabinet painting remains such a strong update option.
But that benefit shows up best when prep is handled properly. The smoother the foundation, the stronger the overall result.
Key Reasons Prep Work Matters in Cabinet Painting
| Prep Step | Why It Matters |
| Deep cleaning | Removes grease, oils, and buildup that interfere with adhesion |
| Sanding | Helps the new coating grip the existing surface better |
| Surface repairs | Reduces dents, chips, and flaws that show through the finish |
| Hardware handling | Helps create cleaner lines and more even coverage |
| Priming | Supports adhesion and helps the finish perform better |
| Edge preparation | Protects high-touch areas that wear faster |
| Detailed inspection | Helps catch issues before they become visible later |
| Consistent surface work | Creates a smoother and more uniform final look |
Prep work matters more than most homeowners think because it affects almost everything that follows.
It affects how well the finish bonds. It affects how smooth the cabinets look. It affects whether the paint chips early or holds up better through daily use. It affects whether the project feels like a lasting update or a short-term improvement.
That is why homeowners searching for a Columbus cabinet painter should pay close attention to the process. A beautiful cabinet color can always catch attention at first, but preparation is what gives it a better chance of lasting.
When prep is done carefully, cabinet painting becomes much more than a cosmetic change. It becomes a practical way to refresh the room with a finish that feels cleaner, stronger, and more worth the investment.
FAQs
1. Why is prep work so important before cabinet painting?
Prep work helps the new finish bond better, look smoother, and hold up longer under daily use.
2. Do cabinets need to be cleaned even if they already look clean?
Yes. Cabinets often carry oils, grease, and residue that are not obvious at first but can still cause adhesion problems.
3. Can cabinet paint peel if sanding is skipped?
It can. Sanding helps create a surface that the new coating can grip more effectively.
4. Will paint hide dents and damage on cabinets?
Not usually. Small flaws often need repair before painting, or they may still show through the final finish.
5. How do I know if a cabinet painter takes prep seriously?
Ask how they handle cleaning, sanding, repairs, priming, and high-touch areas. Their process will usually tell you a lot about the likely result.

James Schrienk, a resident of Columbus, OH, is the proud owner of 3S Painting. With a wealth of experience in managing businesses of various scales, his expertise lies in project and people management. Jim thrives in team environments, always focusing on labor efficiency and delivering high-quality client results. His leadership style and practical communication skills have made him an exceptional manager and a driving force behind the success of 3S Painting. When he’s not leading his team to excellence, Jim enjoys continuously exploring innovative strategies to improve customer satisfaction.